Turn your store into a creative playground! Offer your customers more with the Snapwear x TeeinBlue integration!
Empower your customers to design custom products
Add a WOW factor to your store! Give your customers more than just a product—give them the power to create!
With Snapwear now integrated with TeeinBlue, you can let your customers personalize their orders directly in your Shopify store.
It’s a chance to deliver a unique shopping experience and gain a competitive edge. Because everyone loves having something that’s truly theirs…
And the best part? You can have it all without stocking inventory or worrying about returns!
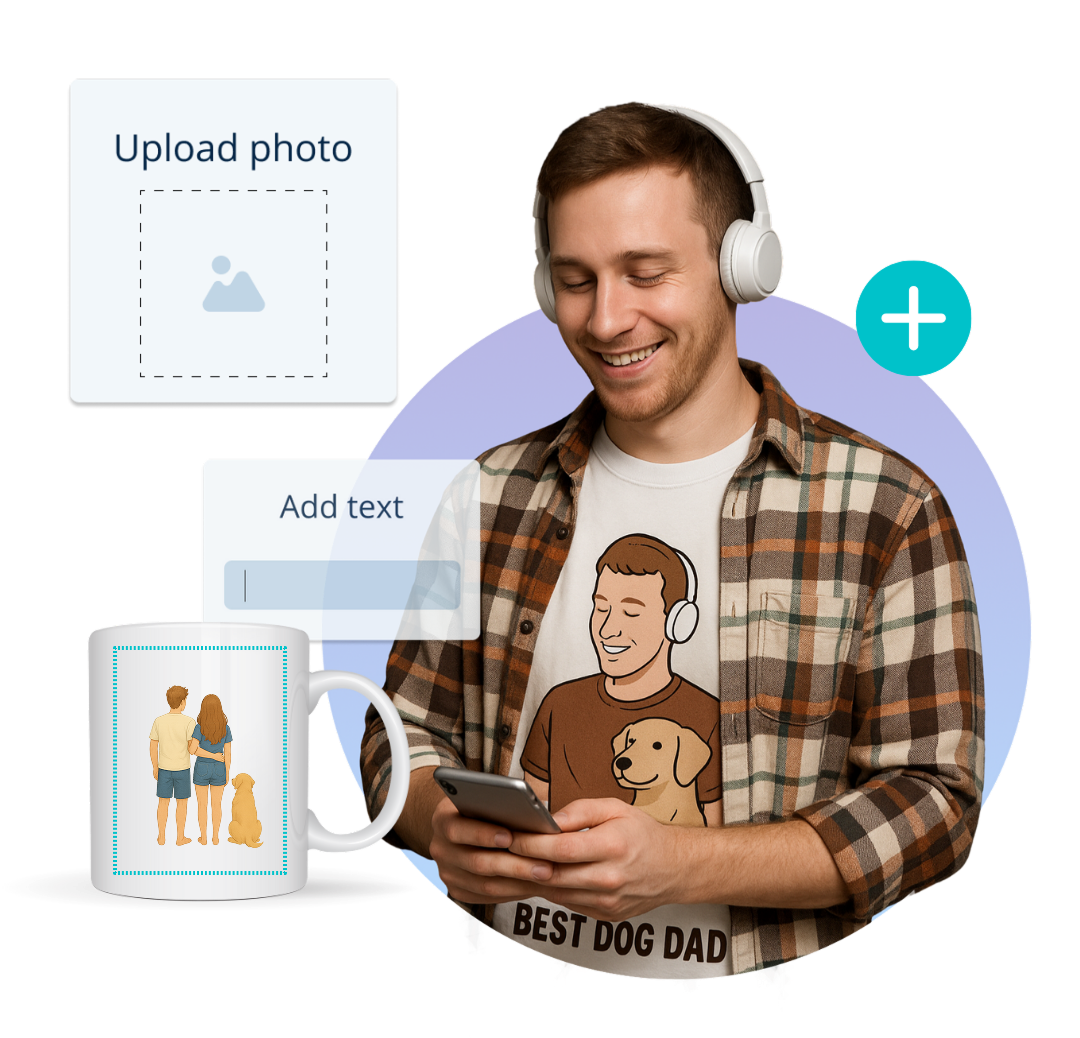
What is TeeinBlue?
“>TeeinBlue is a product personalization app for print-on-demand stores on Shopify. It allows your customers to customize products in real time—adding names, graphics, text, and more. It’s perfect for selling one-of-a-kind gifts and customized items.
Your customers design. We produce. You profit.
With the Snapwear x TeeinBlue integration, you can offer customizable Snapwear products in your store. Customers use an intuitive editor embedded in your Shopify site to design their own unique items. The combination of TeeinBlue’s personalization features and Snapwear’s fulfillment service ensures that orders are fully automated. You focus on promoting your brand—we’ll handle production and shipping straight to your customers.
With the Snapwear x TeeinBlue integration, you can:
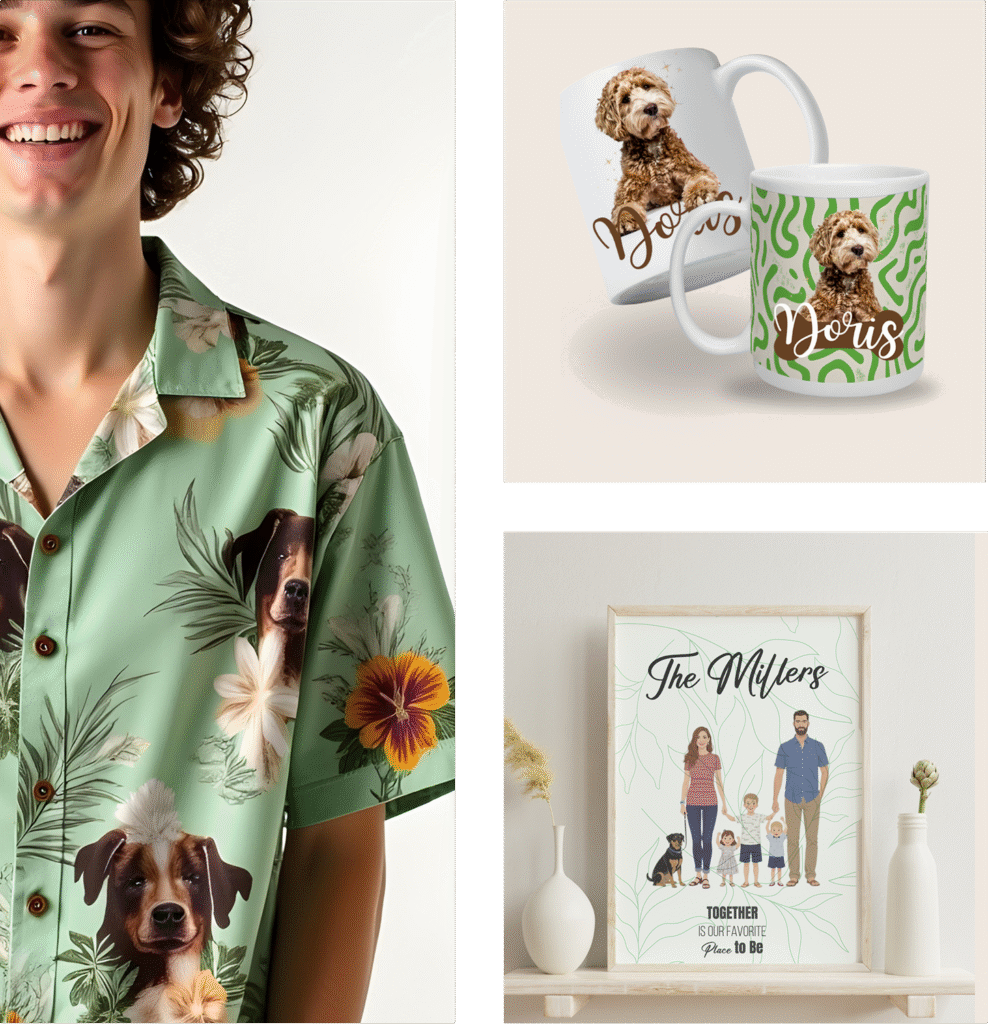
Use Snapwear items as a base for customer-designed creations.
Eliminate the hassle of returns. by offering custom products!
Increase engagement, conversion and brand value.
Is It for You? Absolutely!
If you’re a Snapwear merchant using Shopify, this integration is for you. The TeeinBlue app is available for Shopify users starting at just $19 per month. Get 20% off your first month on TeeinBlue when you register using this link:
Your customers will love creating their own products. You’ll love the simplicity—and the extra revenue!
How does Snapwear x Teeinblue integration work? Step-by-step guide:
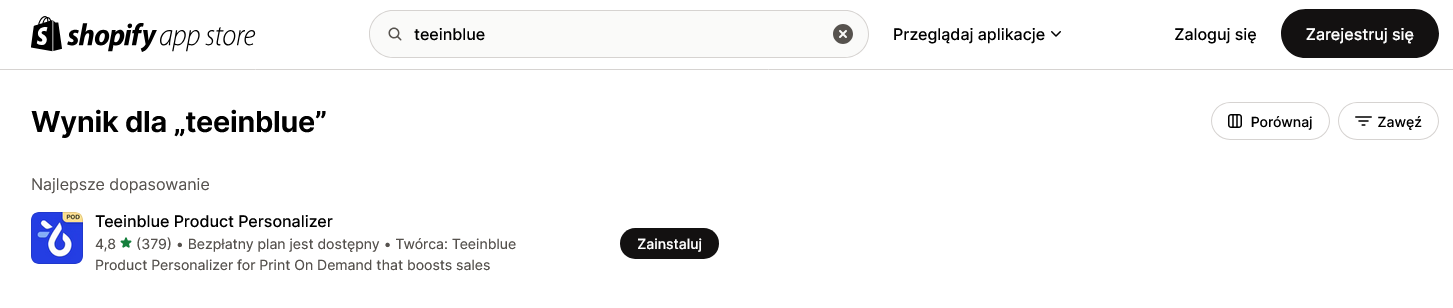
1. Make sure your Shopify store is connected with Snapwear. Next, find and install the TeeinBlue Product Personalizer app in the Shopify App Store.
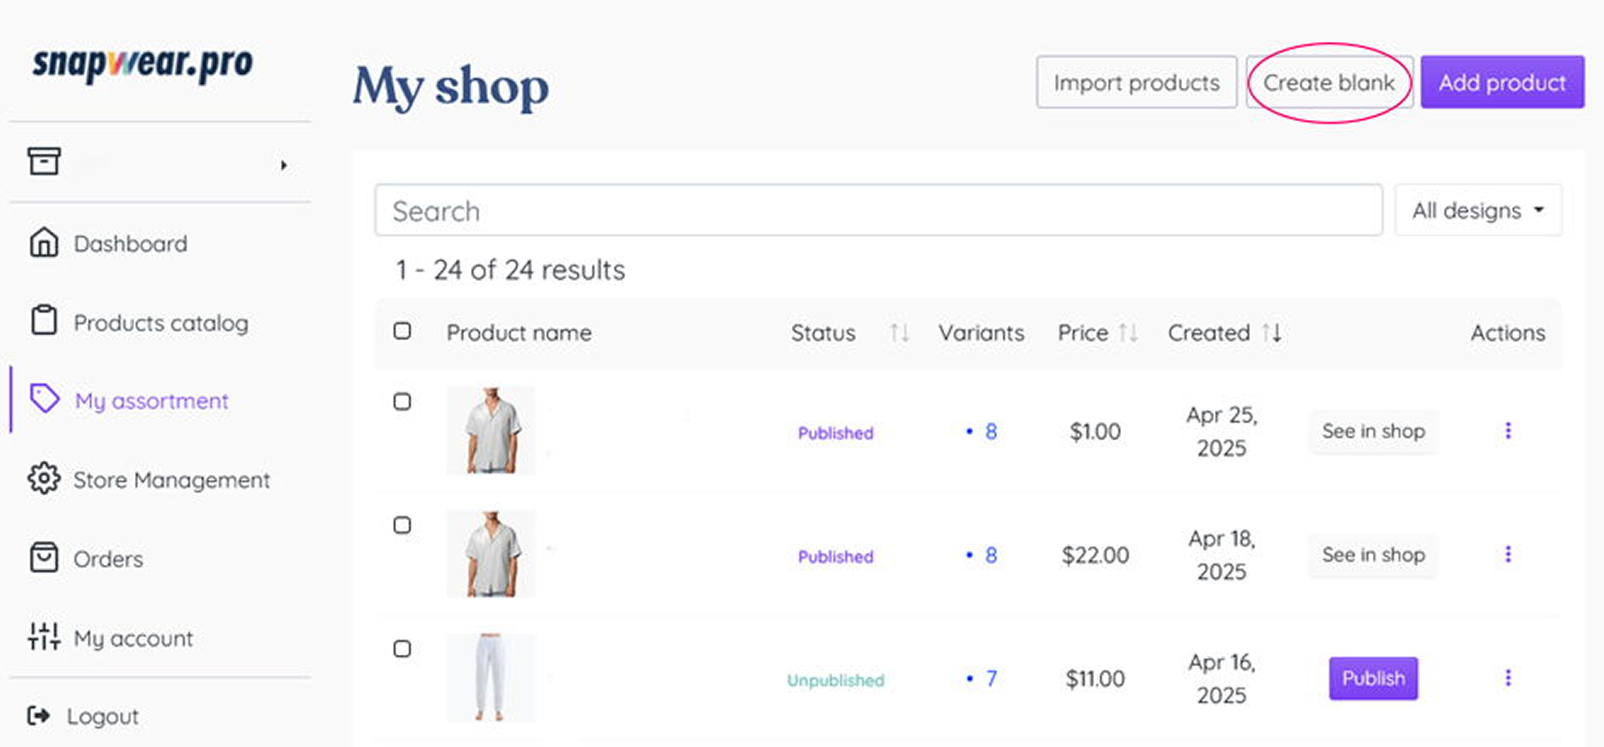
2. Log into your Snapwear dashboard. Go to “My Assortment” and select “Create blank.”
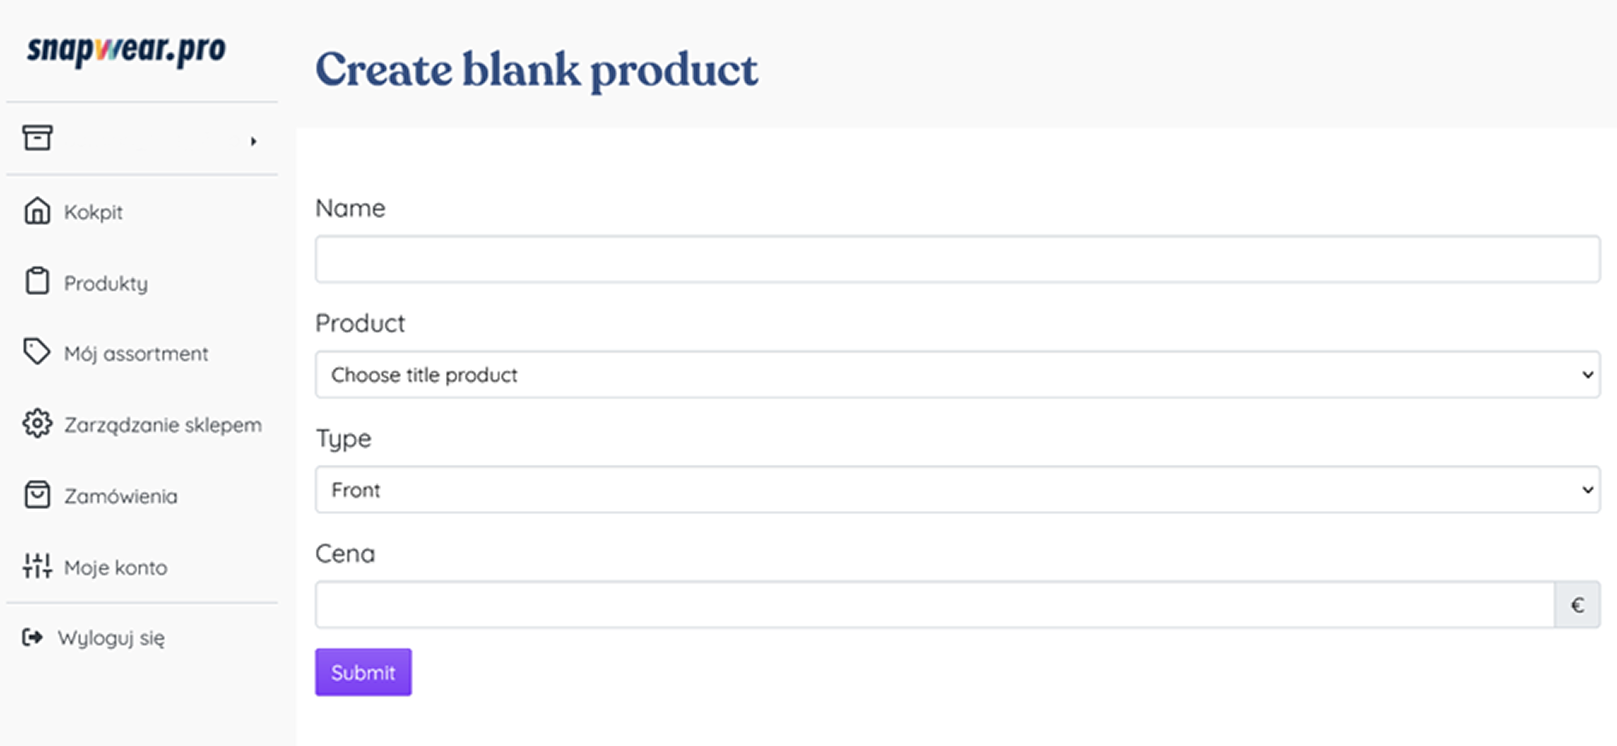
3. Choose the product you want to sell in your store. Name it, select the colors you want to include (hold SHIFT to select multiple), and choose print placement (front, back, or both sides). Set your retail price. Save the product.
4. The product will appear under My Assortment as unpublished. Click “Publish”.
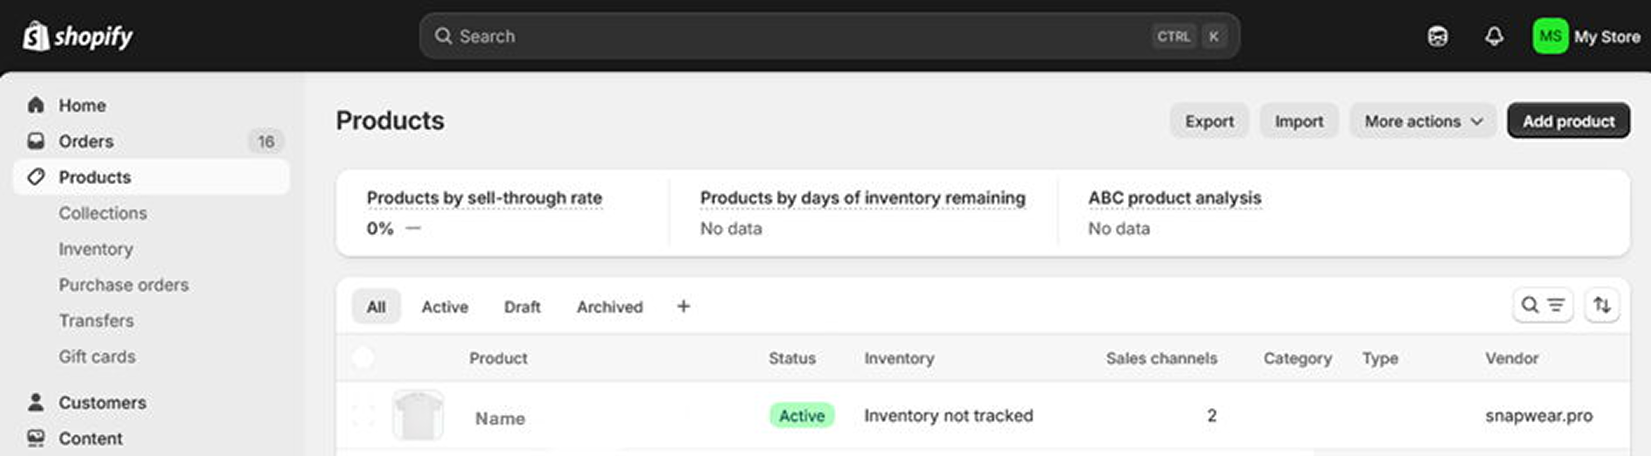
5.In your Shopify dashboard, go to “Products”. Your blank product should be listed there.
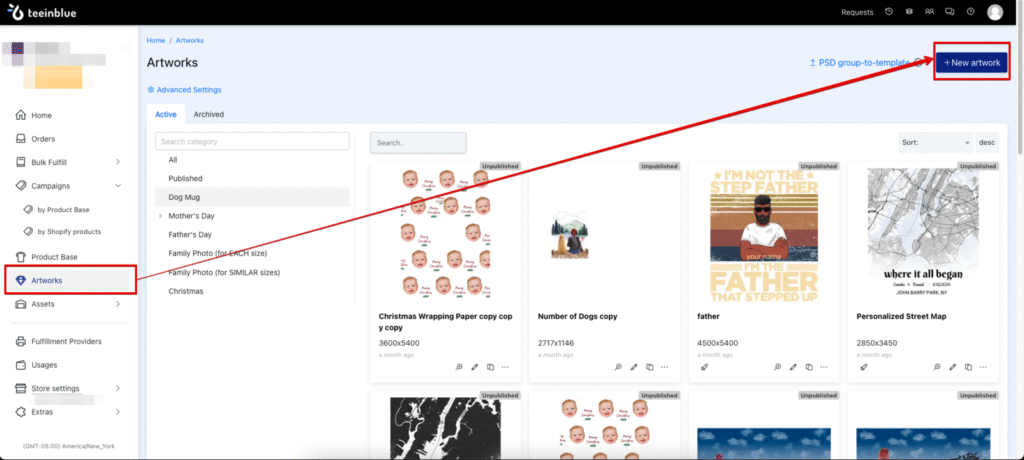
6. Open the TeeinBlue Product Personalizer app. Go to the “Artworks” page to create a design and set up personalization. Click “+New Artwork” to create design from scratch or click “Upload PSD” to upload your Photoshop file. To ensure everything works smoothly with our system, take a look at the PRINT FILES and ARTWORKS section at the end of this guide for tips on how to create proper artwork.
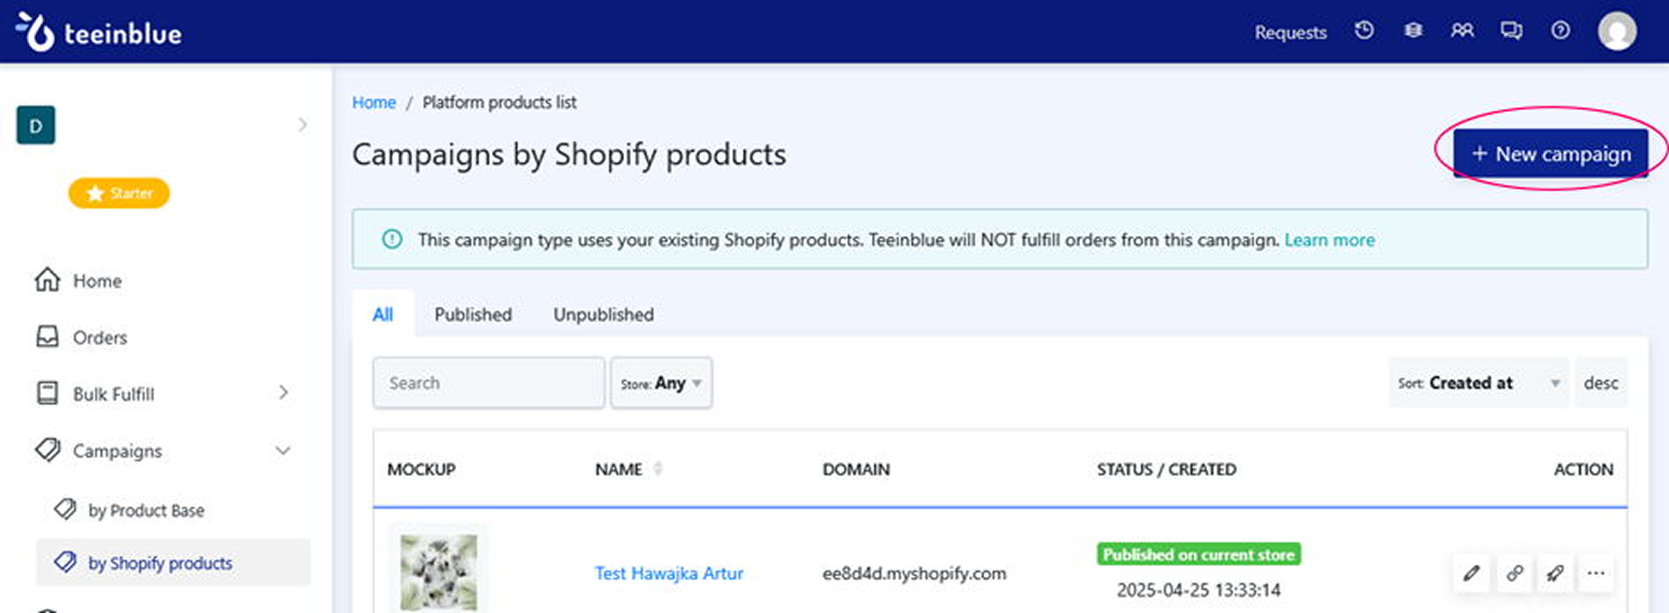
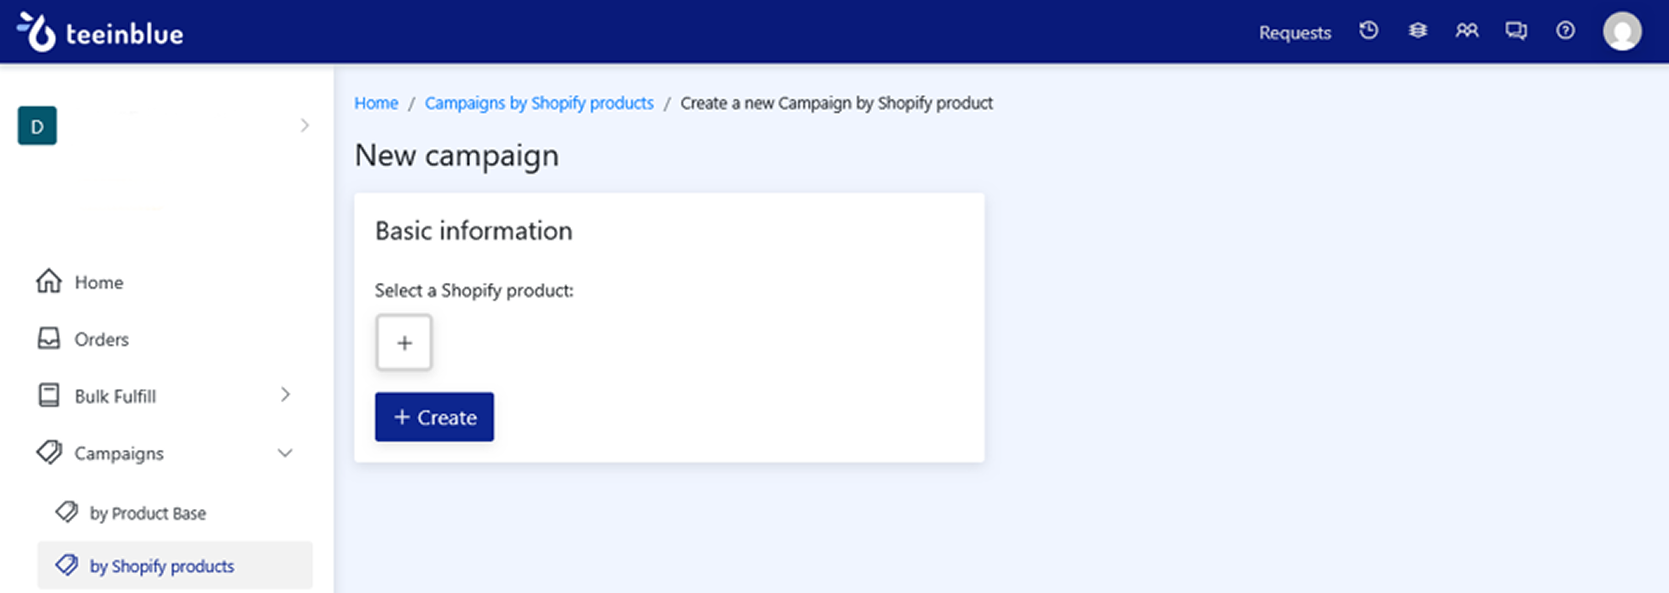
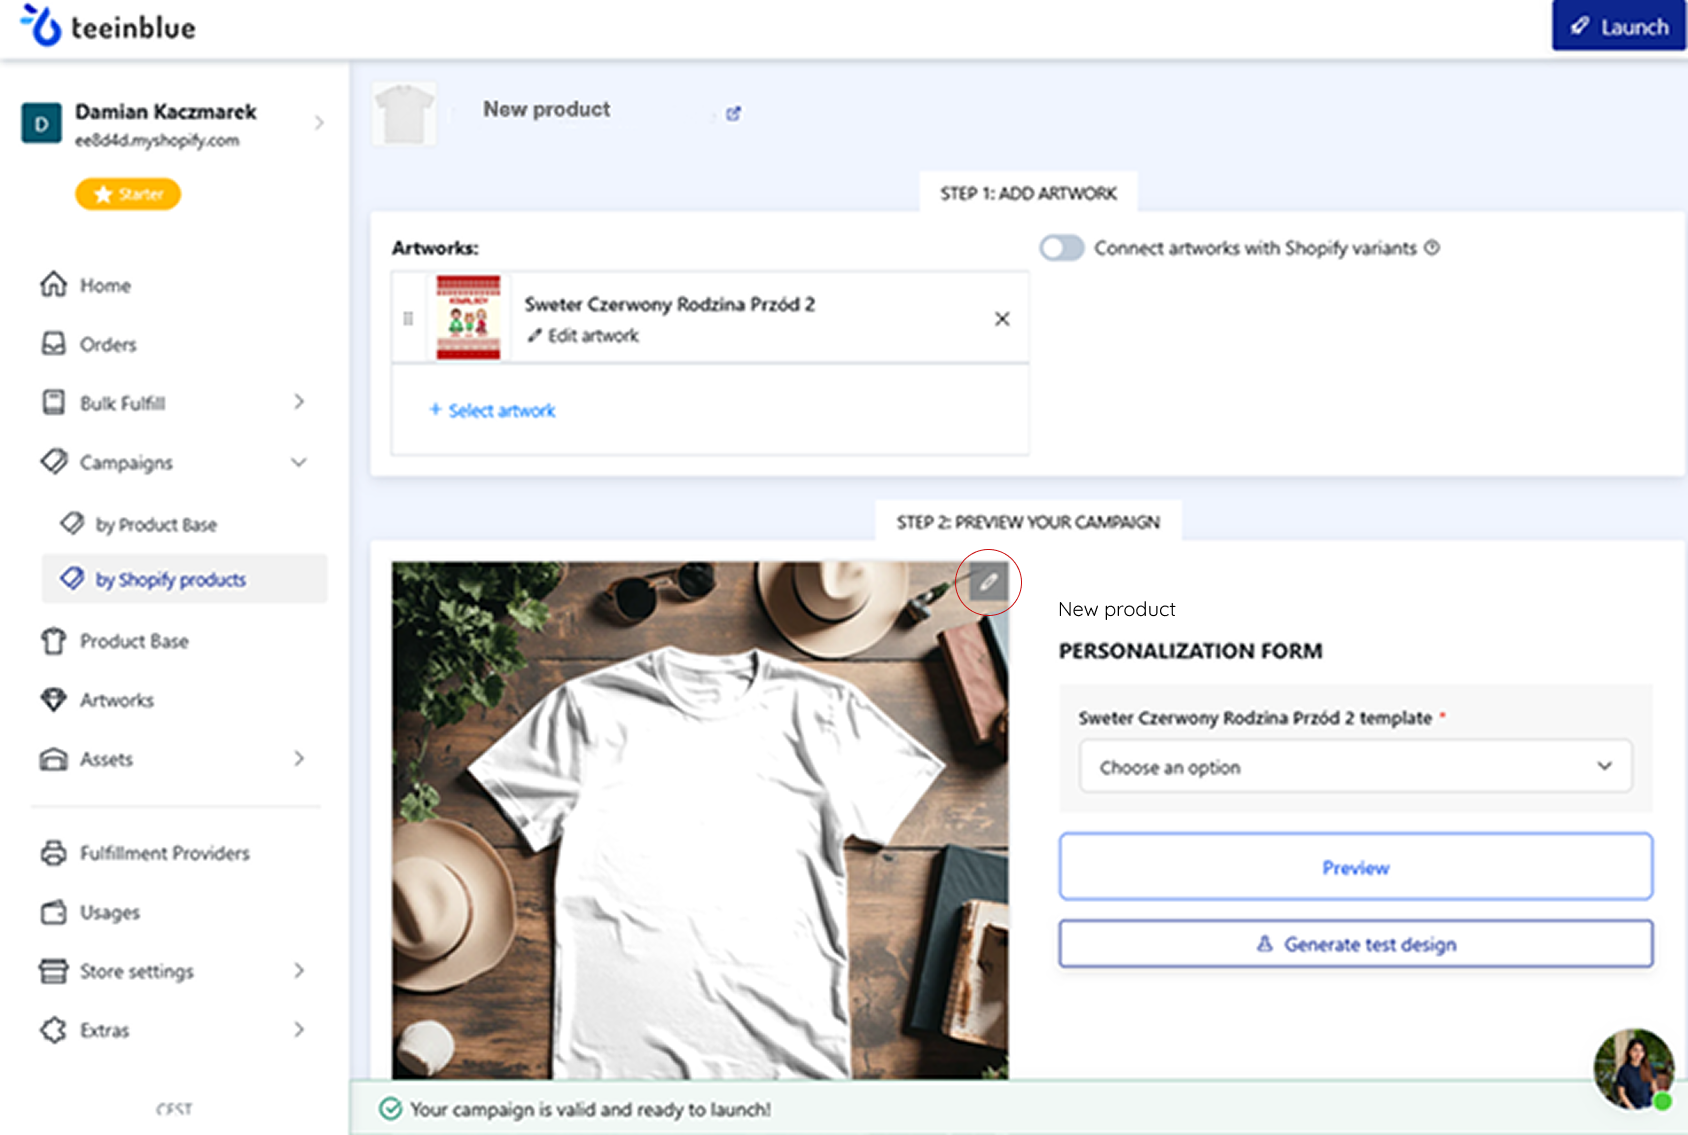
7. Go to “Campaigns” and select “by Shopify product”. Click “+ New Campaign”.
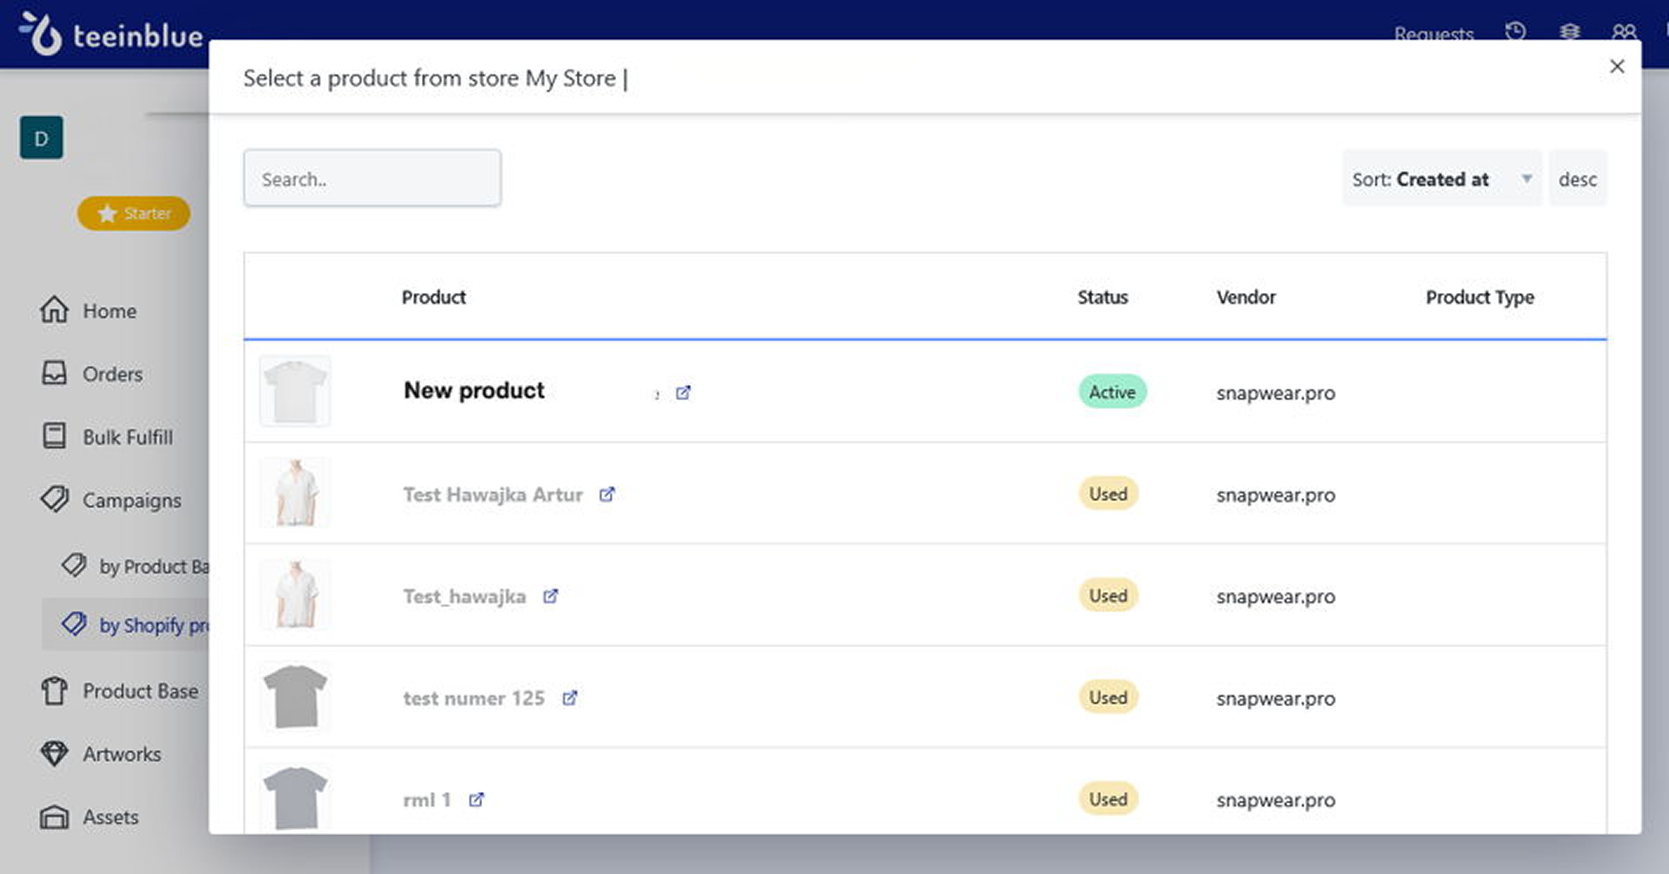
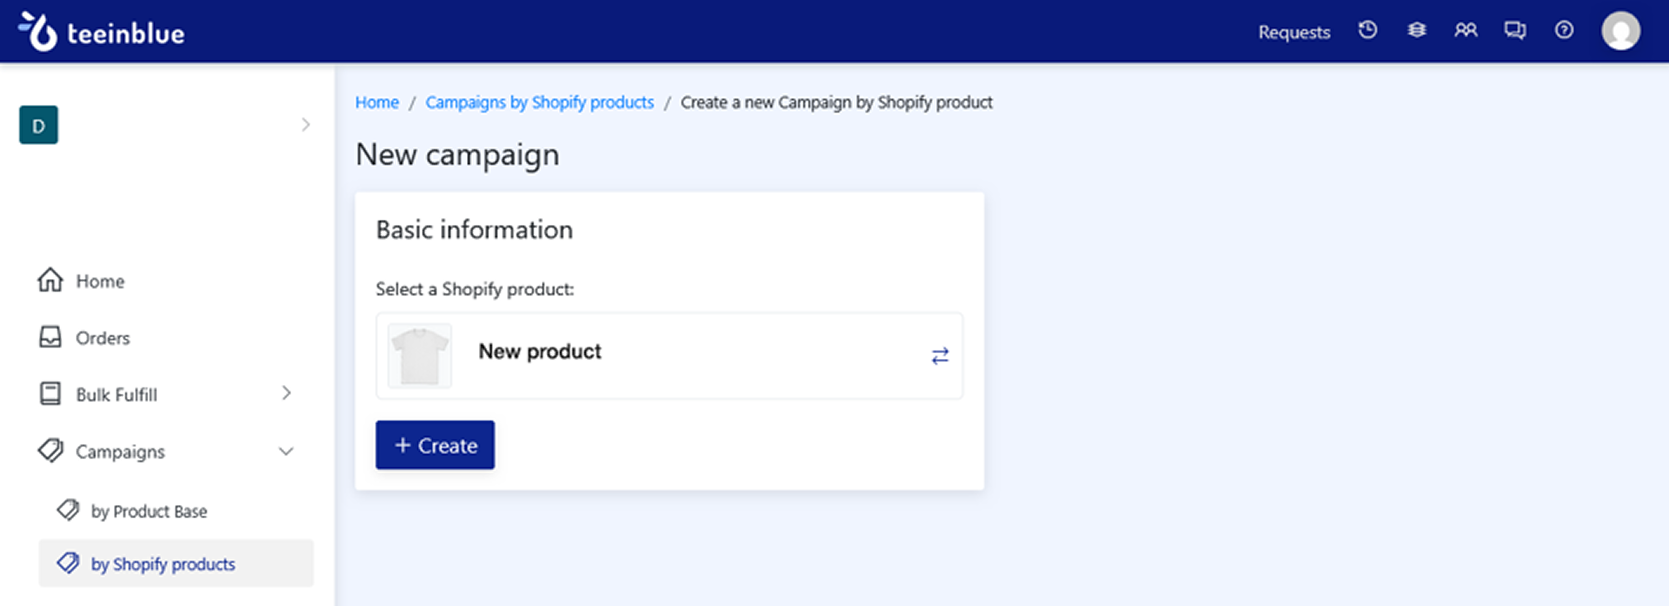
8. Click the “+” icon, select your newly created product from the list, and confirm action by clicking “Create”.
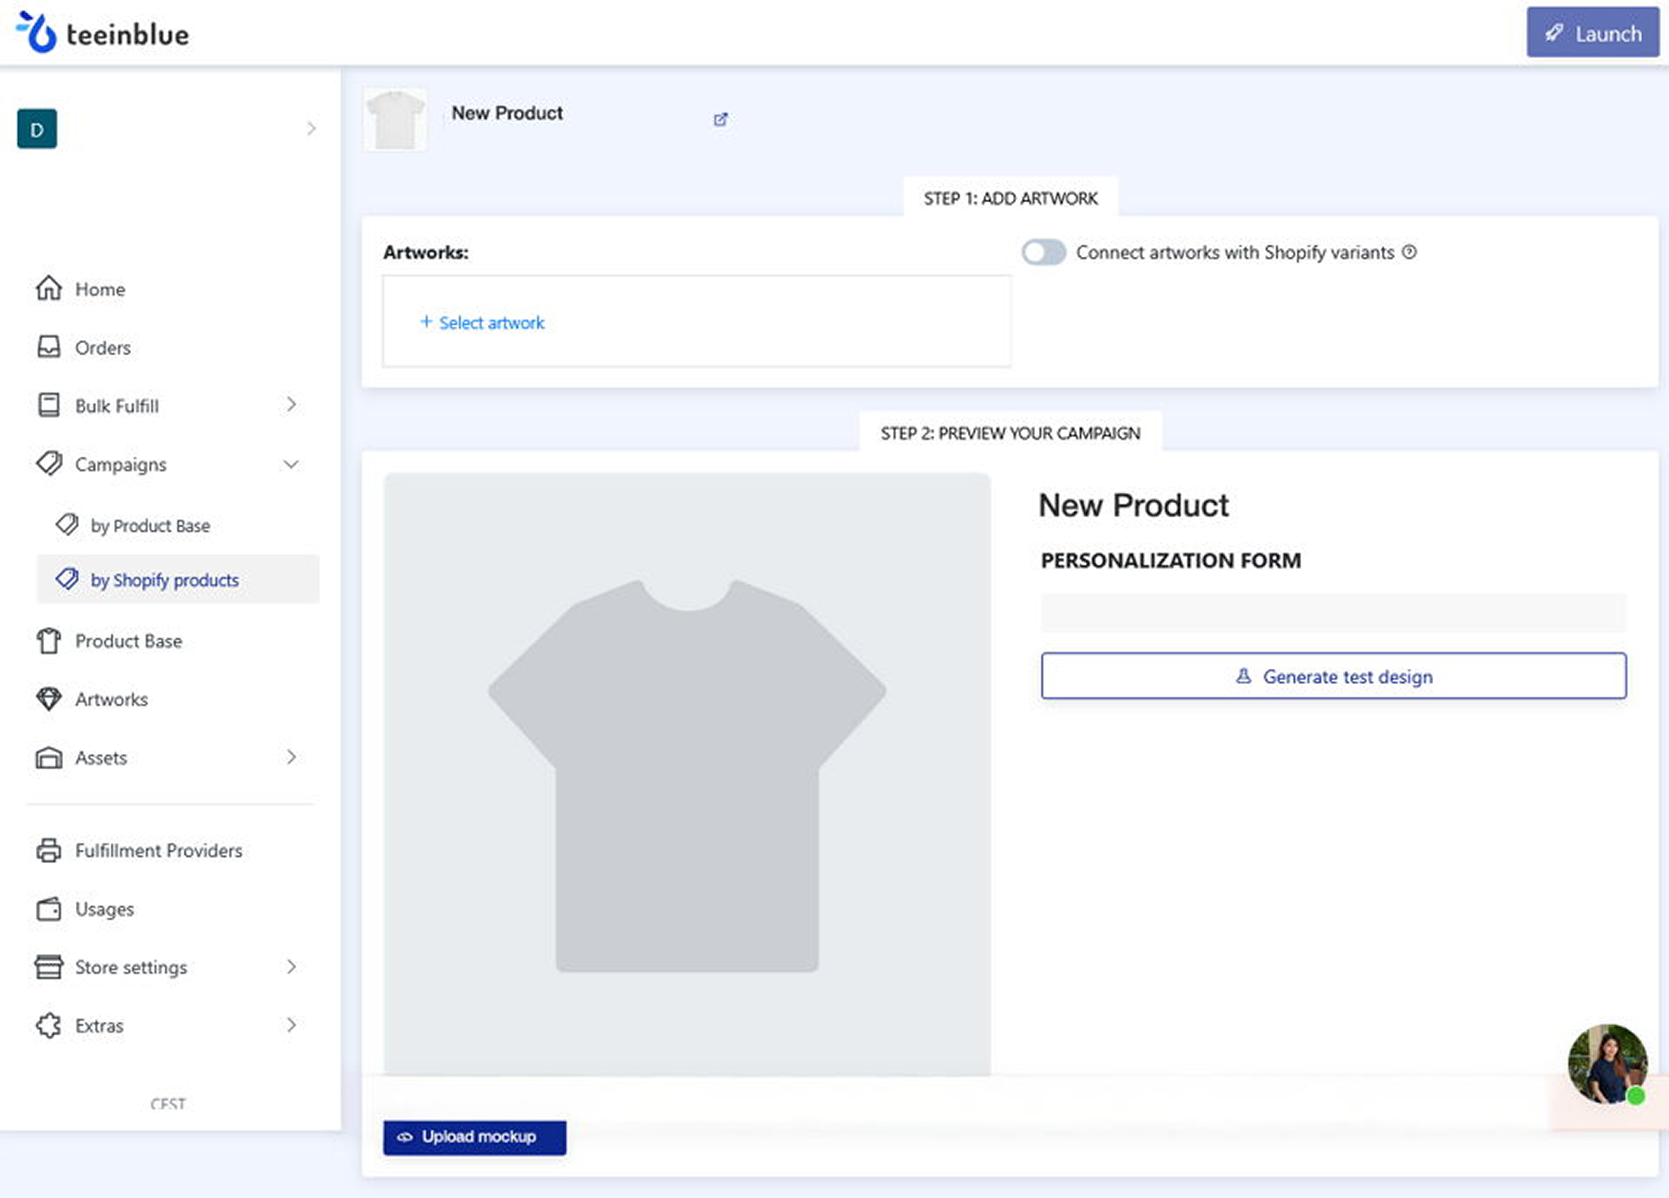
9. Create your product mockup. Click “+ Select artwork” to upload your customizable design. Then, click “Upload mockup.”
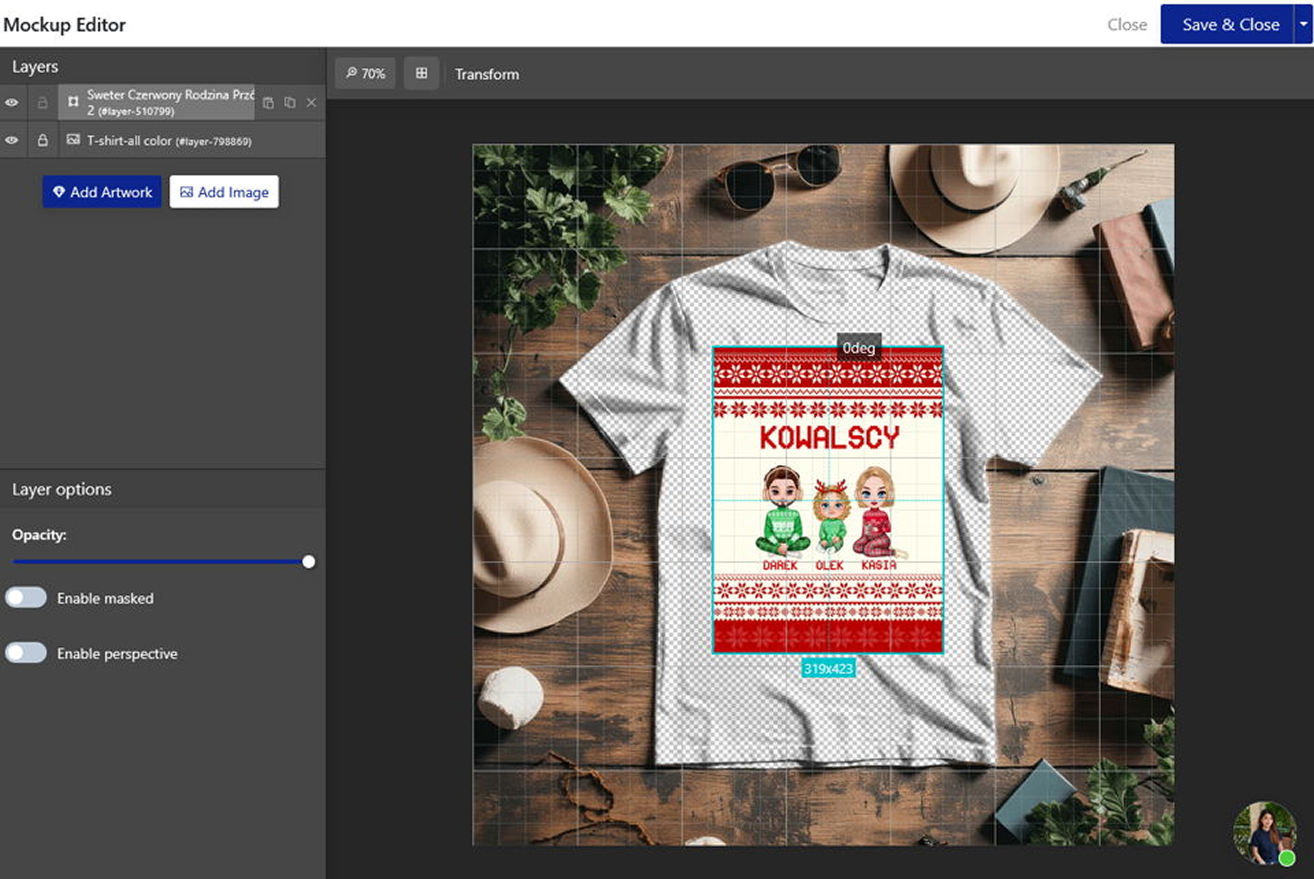
10. Click the pencil icon in the top right of your mockup image to open the mockup editor. Adjust the print placement and size. You can create different mockups for each color variant. Save your design using “Save & Close”. The product will now appear in “Campaigns by Shopify products”.
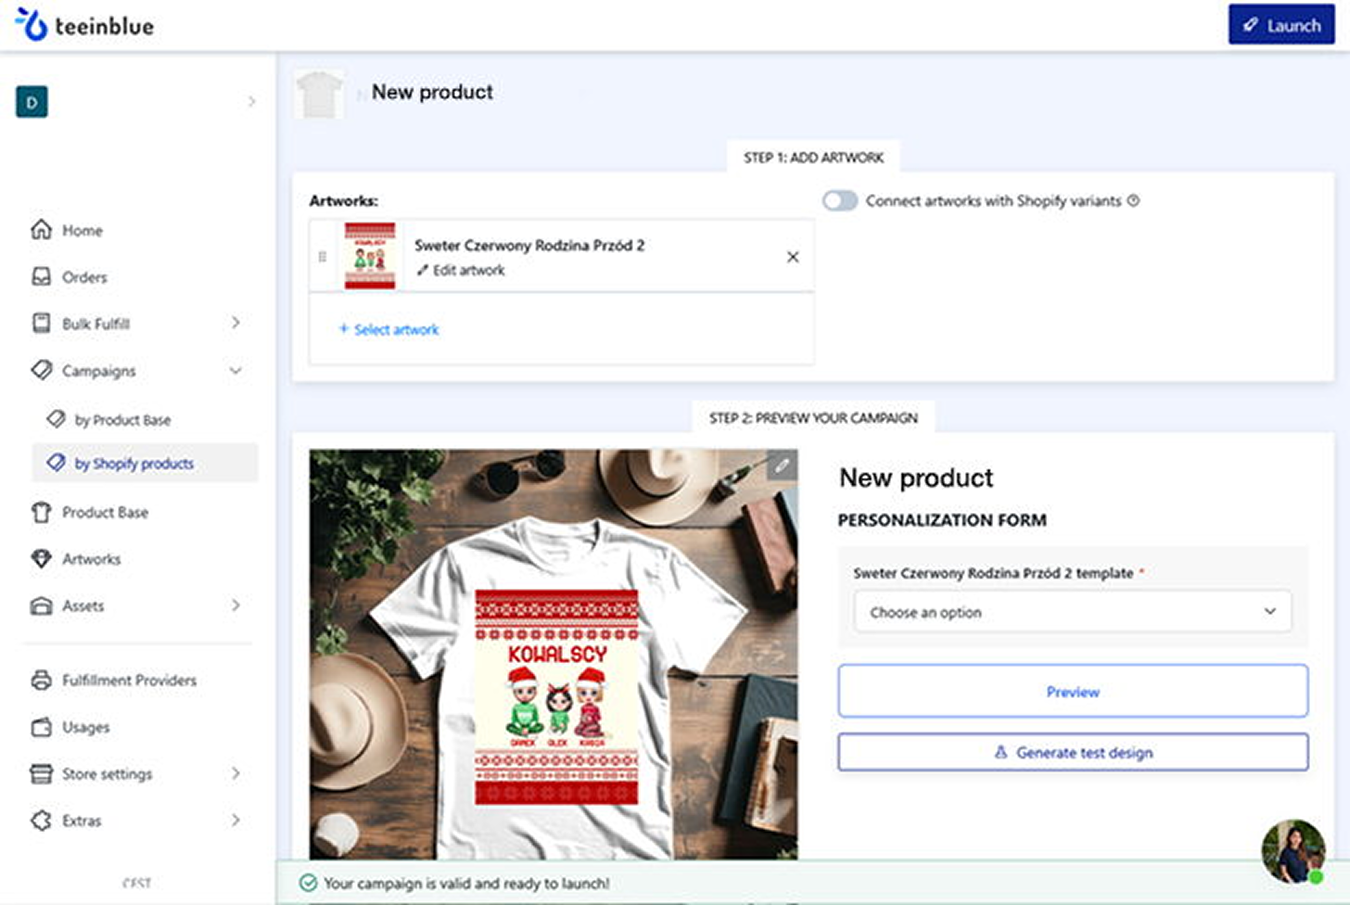
11. Go back into your campaign and click “Launch” to publish the product to your store.
Done! Your campaign is now live, and your customizable product is available in your store. Orders will be sent directly to our system — we’ll produce and ship them to your customers.
Print files: Guidelines for Snapwear Products
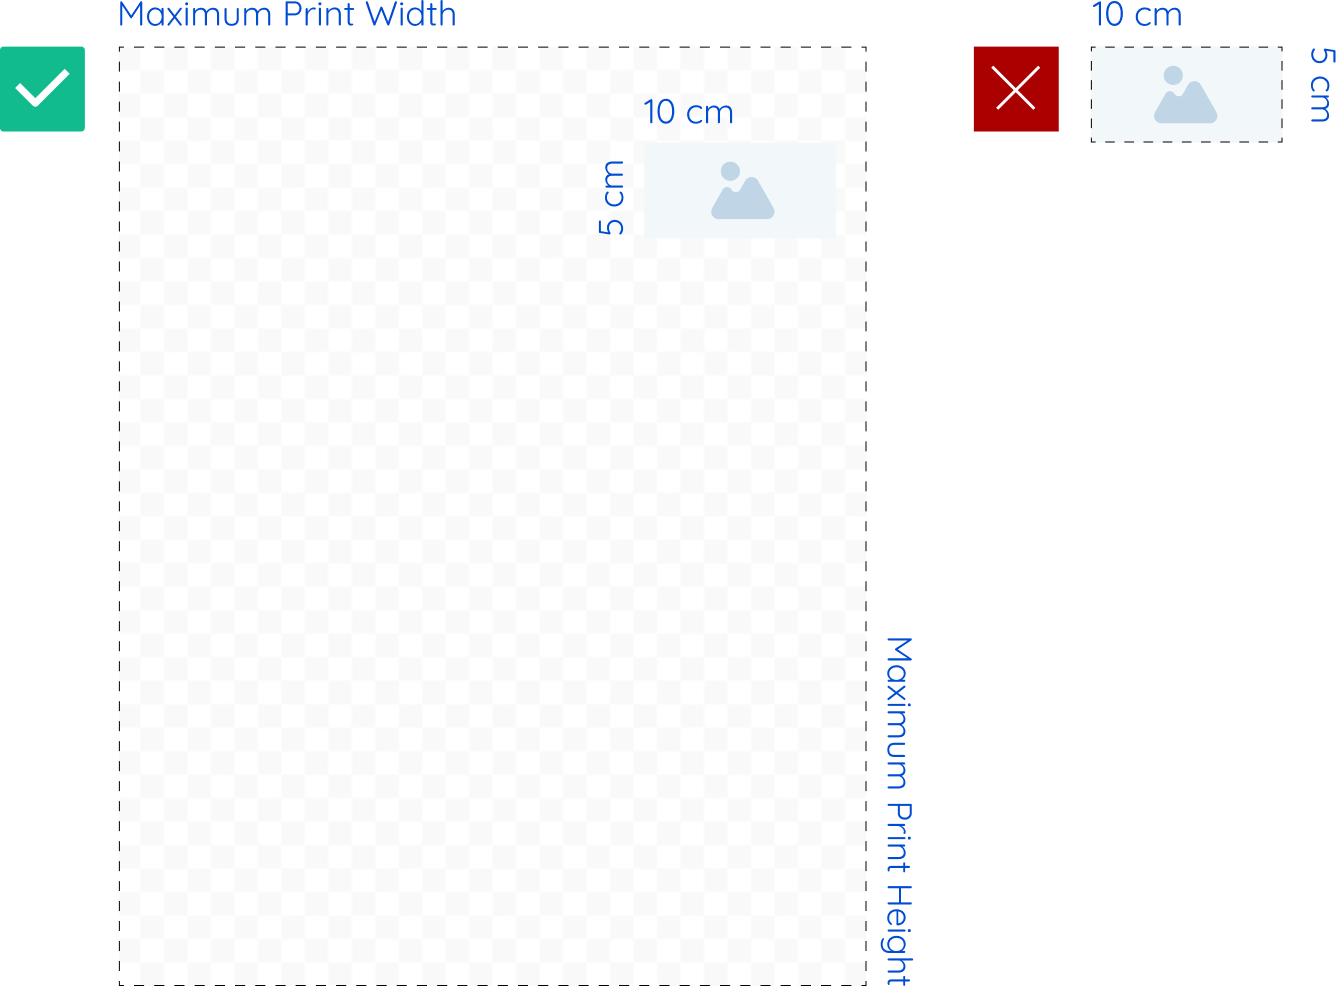
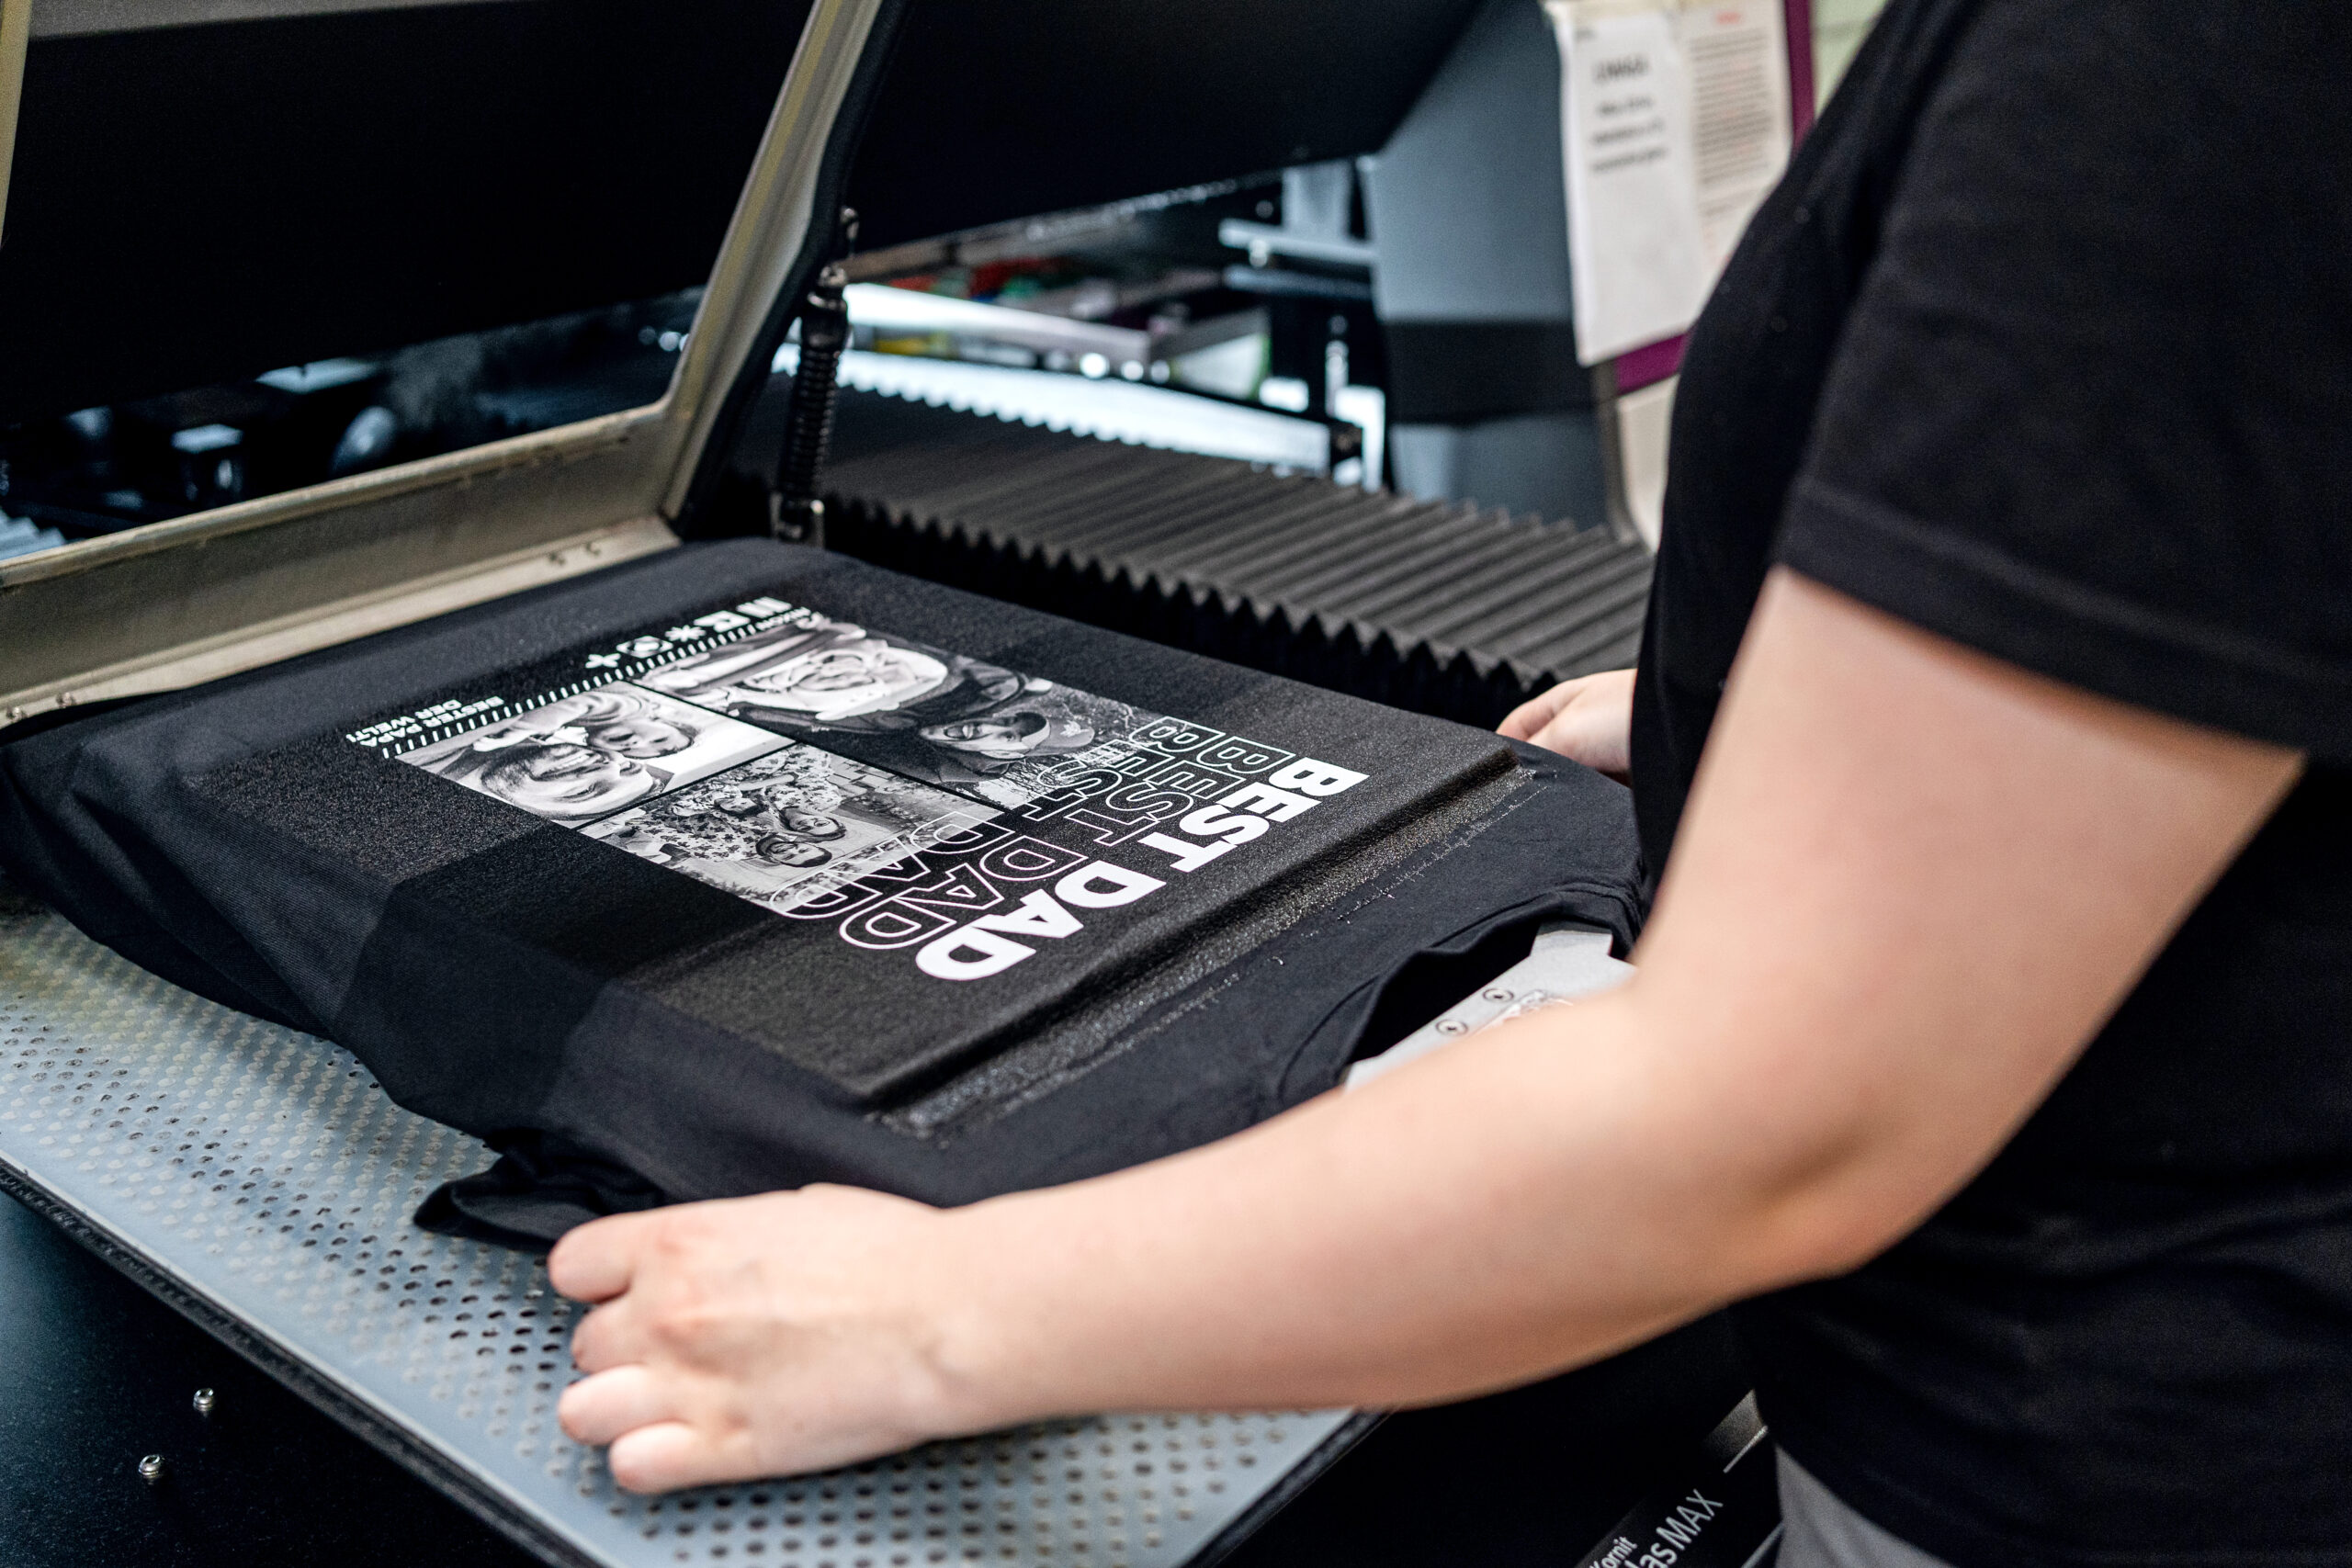
For DTG-Printed Apparel: Artworks created in TeeInBlue will be automatically scaled to the maximum print area dedicated to each product (e.g., 39 × 49 cm for a T-shirt). We recommend creating your designs at a 1:1 scale, using the maximum print size. Always check the specific print area dimensions for each product or contact our support team for clarification.
Example: If you want your print to be 10 × 5 cm and positioned on the left chest of a T-shirt, place the design exactly where you want it within the full print area (e.g., aligned to the left and slightly below the neckline). Use a transparent background and a canvas that matches the maximum print area dimensions (e.g., 39 × 49 cm). Make sure the design is positioned precisely where you want it to appear on the final product. Note: The printable area begins approximately 3 cm below the collar line.
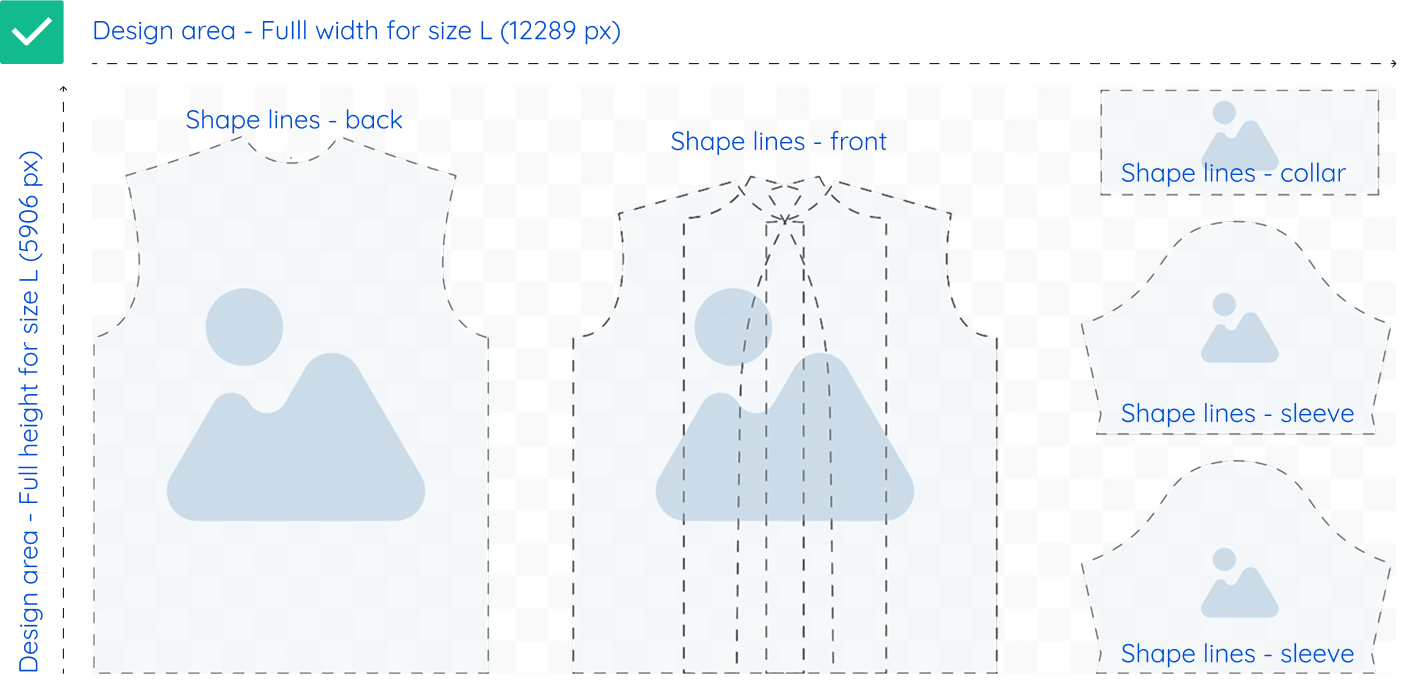
For All-Over-Print (AOP) Products: To create artworks for your All-Over Print mockups, you must use our dedicated product templates and create your design in TeeInBlue according to the template specifications.
Your design file must match the full template size. You don’t need to include cutting or shape lines in the final file — they are used only for placement reference.
Templates are based on one standard size (usually size L) — our system will automatically scale your design for other sizes.
Use bold patterns or seamless graphics for best all-over results.
Avoid placing key design elements (such as logos, text, or faces) too close to the edges of the shape lines. During production, files are automatically scaled to fit different sizes, which may result in cropping or distortion of edge-aligned elements. We recommend keeping important parts of the design within a safe zone — ideally at least 3–4 cm inside the shape borders.
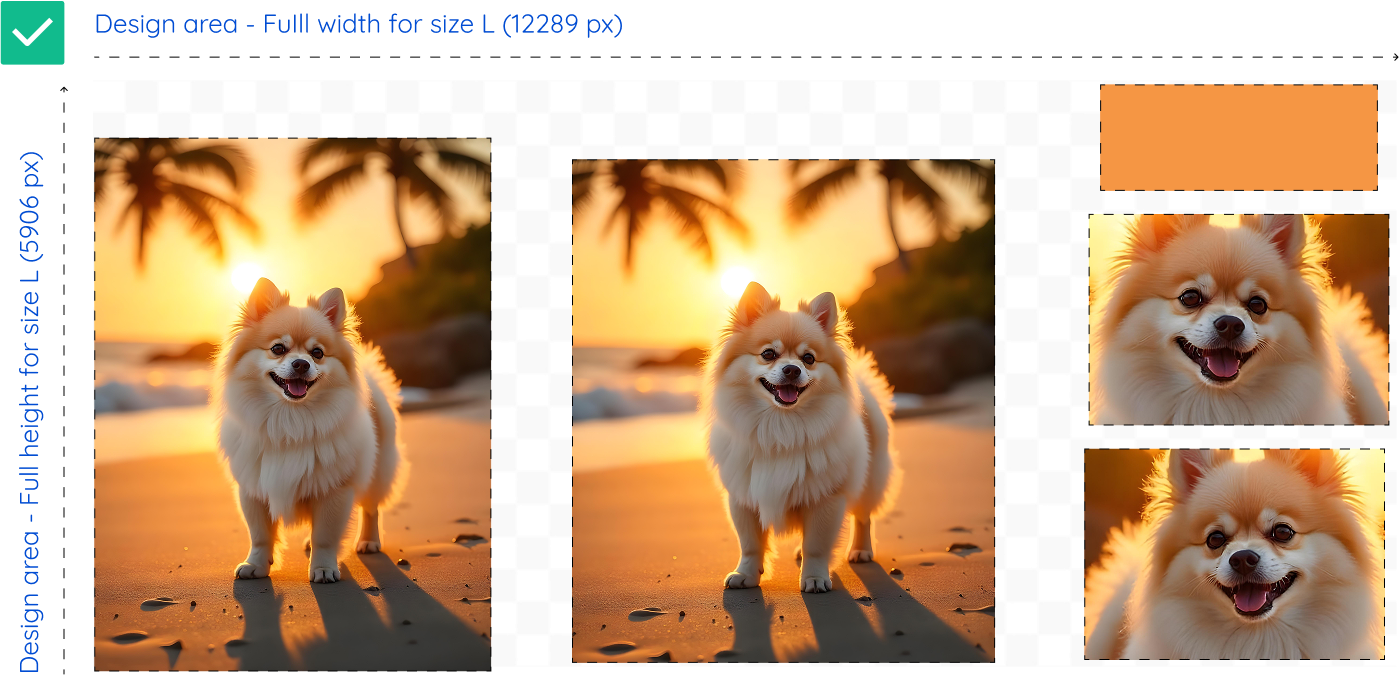
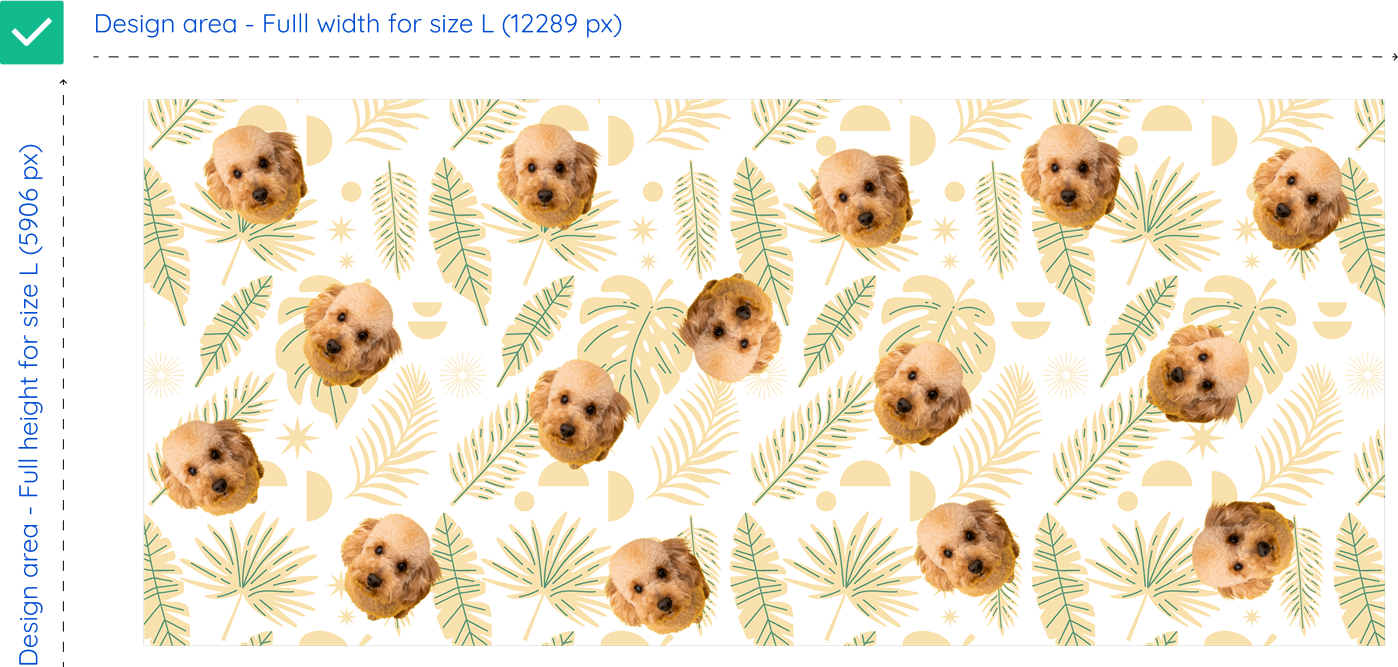
If you want to create a simple, repeatable pattern for your AOP product, your design can simply cover the entire template canvas without focusing on individual product parts. However, please note that only the areas defined by the shape lines (front, back, sleeves, collar, etc.) will be used in the final product. Anything outside those areas will not appear on the printed garment.
Example: If you want to create artwork for an AOP Hawaiian shirt, download the dedicated template for size L (12289 x 5906 pixels). Then, create your design at 1:1 scale, filling the entire template. Your design must fully cover all defined shape areas (front, back, sleeves, collar). Each element is marked with shape lines in the template. To ensure correct results, your artwork should fill the entire canvas and extend over all visible product parts.
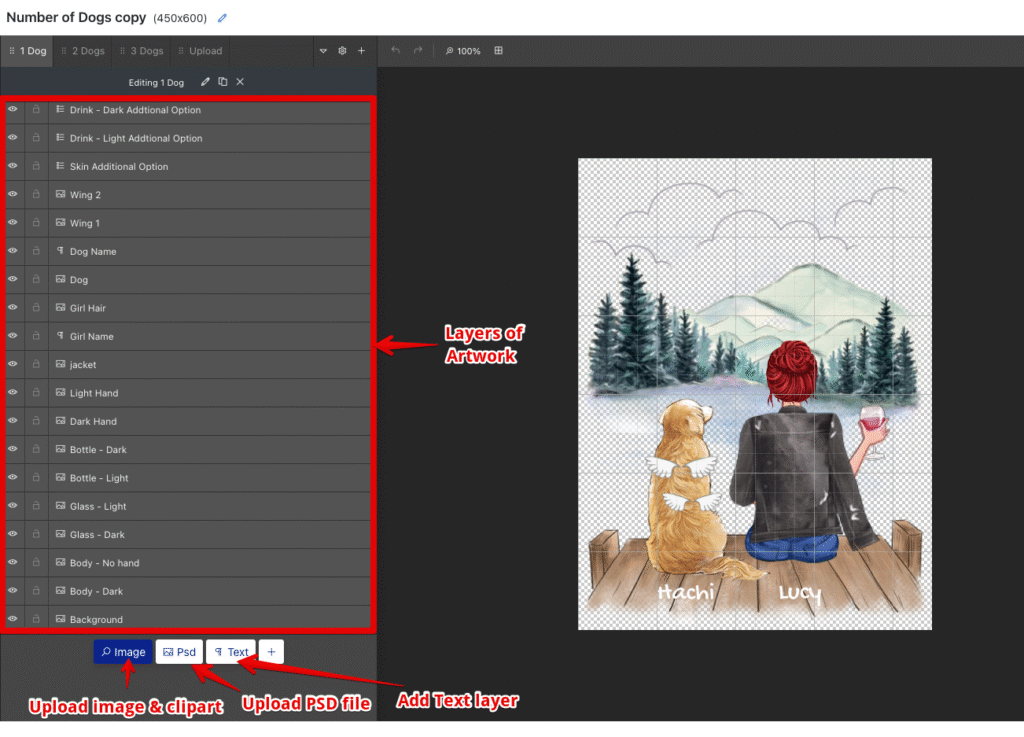
Before creating your campaign, make sure to set up your artwork in Teeinblue:
Create new artwork – Go to the Artworks tab and click + New artwork. Set the canvas size to match your product’s print area.
Add layers – You can add images, text, or PSD files. For best results, add layers manually instead of uploading full PSDs to avoid scaling or cropping issues.
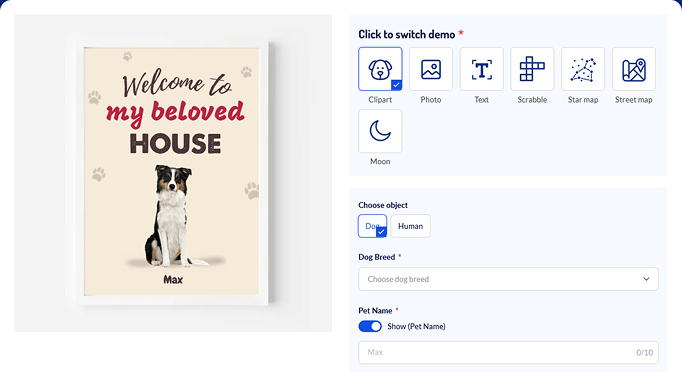
Set personalization options – Click the pencil icon next to a layer to open its settings panel. Then, check “Allow personalization” to enable customization. Depending on the layer type, you can adjust the following options:
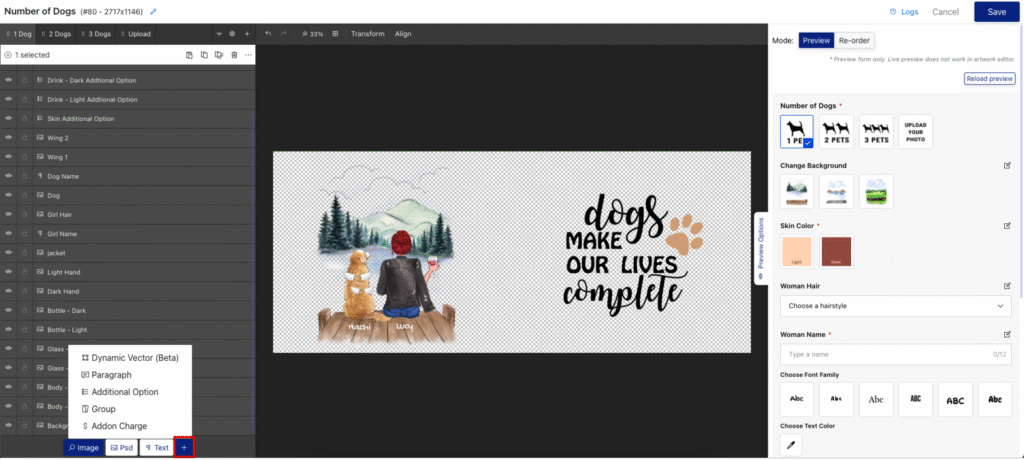
Text layers – Let customers enter custom text (e.g., a name or quote). You can define default text, font, character limits, and color options.
Image layers – Allow users to upload their own photo or select from predefined images (e.g., different hairstyles, pets, or characters).
Color variations – For elements like hair, clothing, or backgrounds, create multiple images in different colors and assign them to custom selectors (e.g., “Hair Color”). When the customer selects a color, the corresponding image layer is shown.
Group or conditional layers – Show or hide certain layers based on user selections (e.g., showing different poses or character sets depending on the number of people).
This step is essential to make your artwork interactive and ready for dynamic personalization in the campaign.
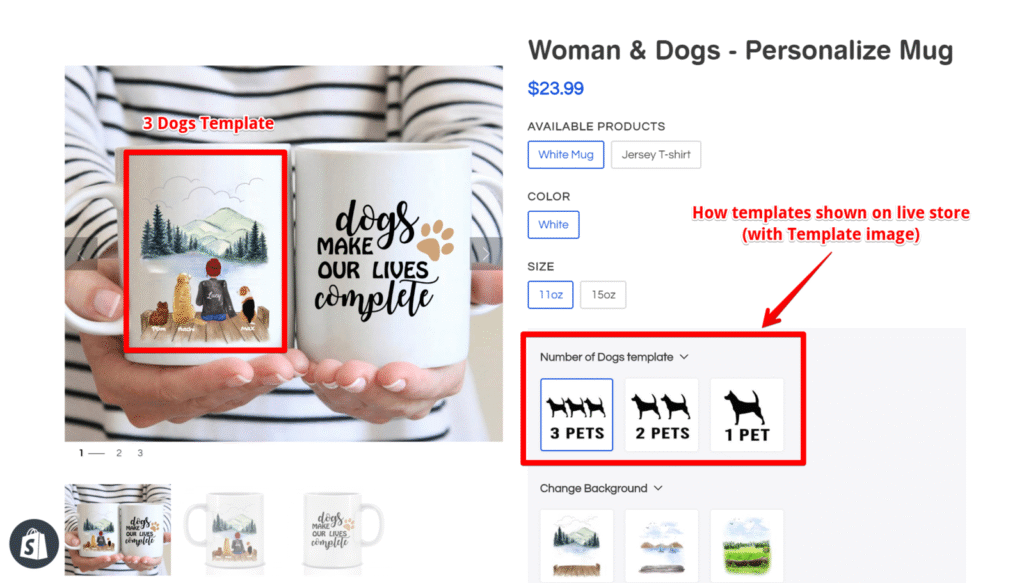
Use templates – Templates allow you to create multiple layout versions within a single artwork. For example, if your product supports 1, 2, or 3 pets, each layout can be a separate template. This helps personalize the design dynamically without creating multiple separate artworks.
Visit the Teeinblue Help Centerfor detailed guides and examples:
New to TeeinBlue? No worries! Explore video tutorials to learn how to prepare artwork, set up your personalized products, and get the most out of the integration.